
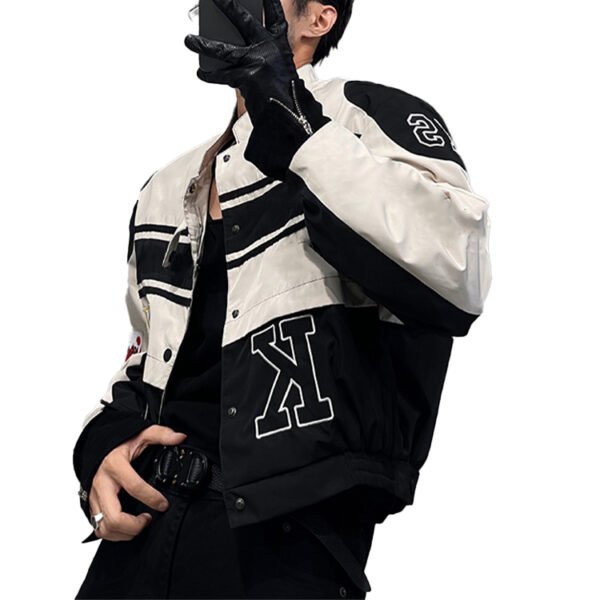





This custom racing-inspired jacket is developed as a fabric-utilization problem with visible design consequences. Large contrast panels, sleeve volume, directional bands, and prominent applique-style graphics must fit the marker without sacrificing symmetry. VeeWen can validate the cut plan and appearance before the 100-piece-per-style minimum is scheduled.
Fabric Width Drives the Graphic Layout
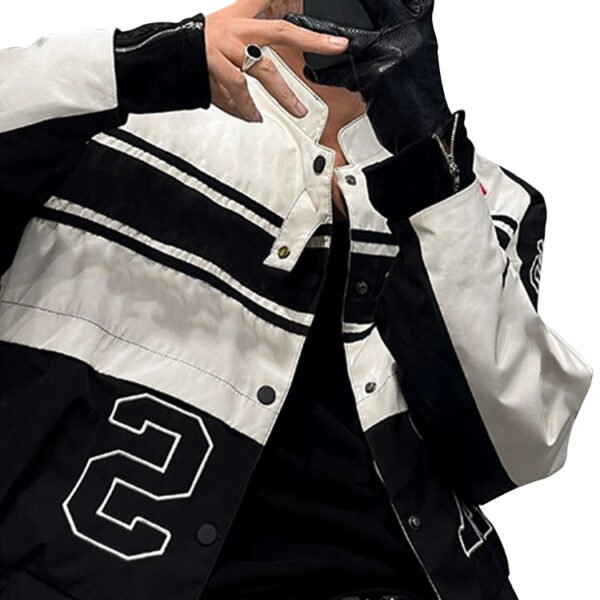
The supplied image shows a jacket built from large black and off-white zones, with contrast extending across the torso and sleeves. Fabric width determines whether those panels can be nested efficiently while keeping their visible boundaries aligned and their grain direction consistent.
If the usable width is narrower than the pattern requires, additional joins or rotated pieces may change the appearance and increase consumption. Development should therefore begin with confirmed fabric width, usable selvedge allowance, panel dimensions, and the visual priority of each color boundary.
Why Stripe Direction Requires Marker Discipline
Horizontal bands cross the chest and upper sleeves in the image, creating a strong visual rhythm. Any change in grain direction, stripe registration, or panel height can make one side appear higher than the other. The marker must protect directional placement before efficiency is considered.
A buyer should review a paper or digital marker alongside the first cut sample, checking chest bands, sleeve bands, and front closure alignment. This makes the consumption decision visible: modest fabric savings are acceptable only when they do not compromise the jacket's central graphic structure.
Large Sleeves Change Consumption Quickly
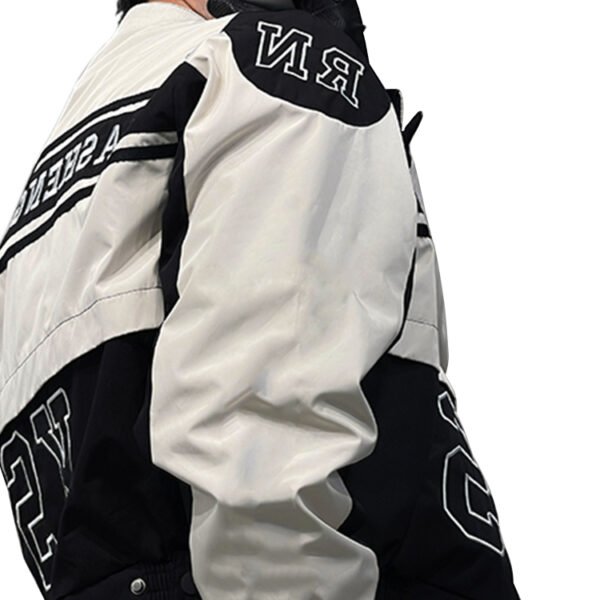
The jacket's sleeves appear full and articulated rather than narrow, so they occupy substantial marker area. Sleeve width, cuff treatment, and upper-arm color blocking can create unusable spaces around the body panels. Those spaces should be measured, not estimated from a flat sketch.
VeeWen's development team should compare at least two nesting approaches after the sleeve block is confirmed: one prioritizing symmetry and one prioritizing utilization. The buyer can then choose an acceptable balance based on appearance, material availability, and the planned style assortment.
Patch Placement Adds Cutting Constraints
Prominent outlined patches or embroidered graphics appear on the front and upper sleeve. Their positions are part of the garment's balance, not isolated decorations. They may require stable panel dimensions, seam clearance, and consistent orientation so the graphics do not drift across sizes.
Before approval, the sample should show the actual graphic scale and placement on the selected panels. The production file should identify which pieces carry embellishment, because changing panel shapes after embroidery or applique planning can invalidate the marker and create avoidable material waste.
Turning Width Planning into VeeWen Workflow
VeeWen should make fabric width planning a defined development gate: confirm the material's usable width, map the color-block panels, place directional bands, and calculate the proposed marker before finalizing the sample. This workflow addresses the jacket's graphic geometry directly.
The buyer's checkpoint is a combined appearance-and-consumption approval. Sign off the marker assumptions only after inspecting panel symmetry, stripe registration, sleeve balance, graphic clearance, and estimated usage, with any material or pattern change routed back through the same review.
Scaling the Marker Across Sizes
A marker that works for one size may become inefficient or visually uneven when graded. Larger sleeves and torso panels can change the ratio between fabric width and pattern width, while smaller sizes may create new gaps. Size grading must therefore be evaluated as a complete range.
Approve the size set with representative cut layouts, especially the smallest and largest planned sizes. Confirm that contrast boundaries, sleeve stripes, and graphics retain their intended positions, then lock the material width and consumption assumptions before applying the 100-piece-per-style minimum.
Buyer Questions
What fabric information is needed first?
Confirm usable width, composition, weight, surface, coating, shrinkage, and directional behavior before finalizing the marker, panel dimensions, or consumption estimate.
Why does the marker affect appearance?
The marker controls grain direction, stripe registration, color boundaries, and graphic alignment, so fabric utilization decisions can directly change the jacket's visual symmetry.
Can the panel colors be changed?
Yes, the color-block plan can be revised, but every change should be rechecked for width compatibility, marker efficiency, graphic balance, and sample appearance.
What is the commercial minimum?
The exact commercial minimum is MOQ: 100 pieces per style. Final quantity planning depends on approved materials, sizes, colors, and production confirmation.
Approve the Marker Before Bulk Cutting
Share the intended size range, fabric width, color-block artwork, and graphic dimensions for a marker-led sample review covering symmetry, stripe registration, sleeve balance, and consumption approval.



Reviews
There are no reviews yet.